Minecraft using the wrong GPU
If you have a laptop with both an integrated GPU and a dedicated GPU, Minecraft may use the integrated GPU by default. This can cause performance as well as issues launching the game. To fix this, you can force Minecraft to use the dedicated GPU.
- NVIDIA
- AMD
To force Minecraft to use the dedicated GPU on NVIDIA, follow these steps:
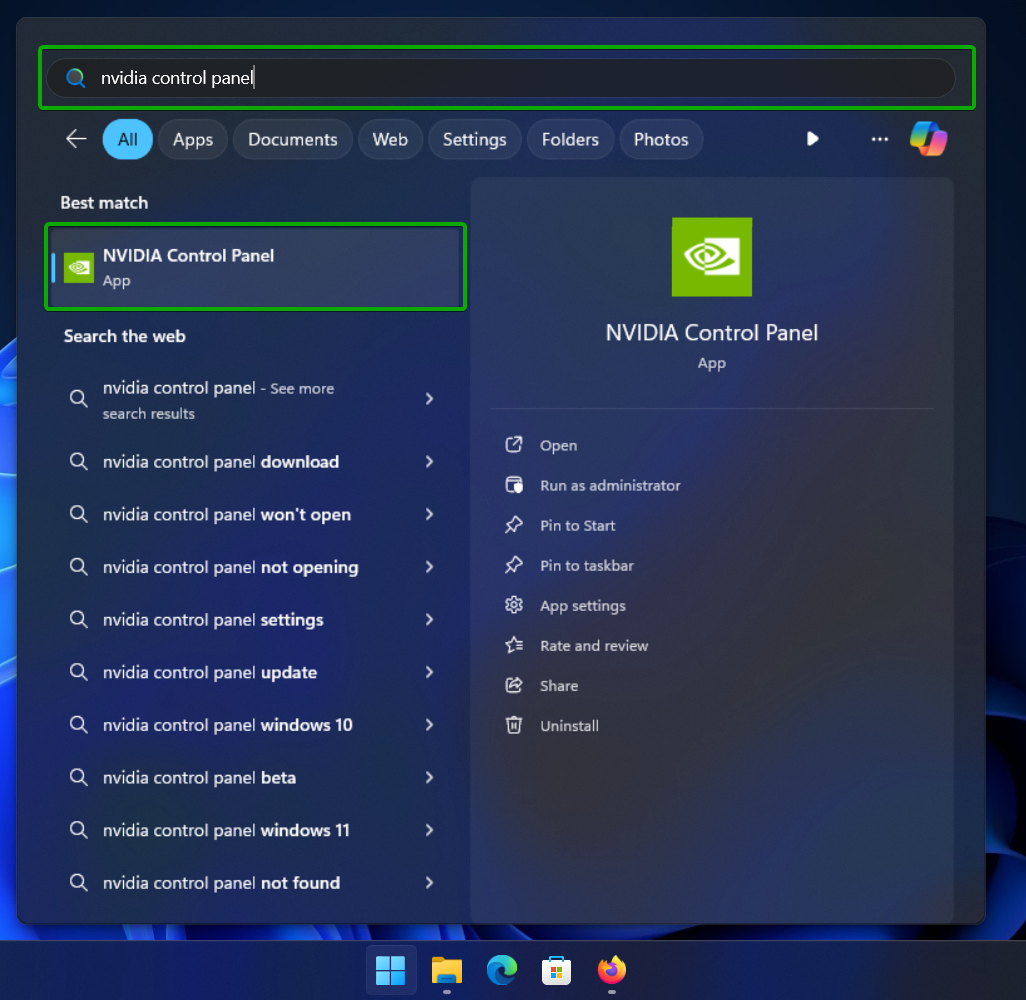
- Open the start menu.
- Search for
NVIDIA Control Paneland open it.
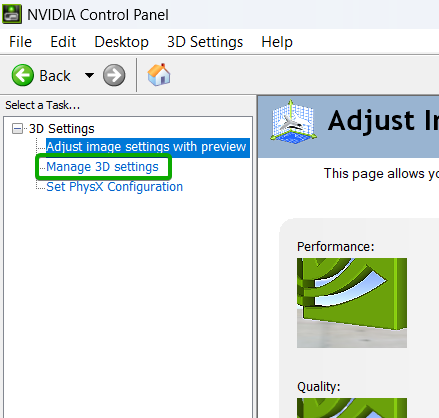
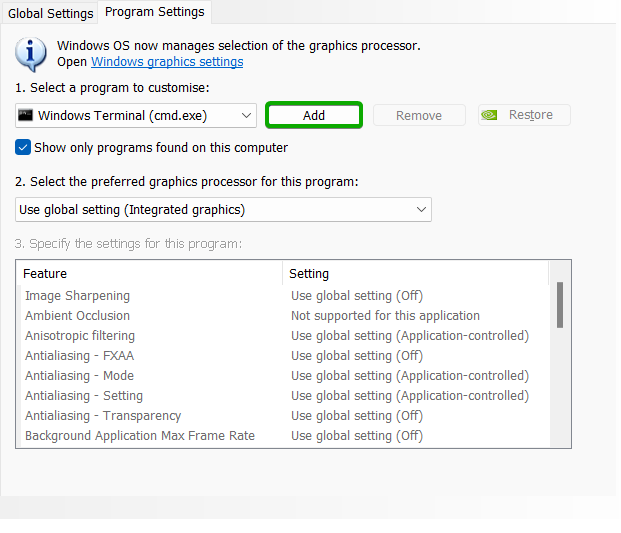
- In the
NVIDIA Control Panel, click onManage 3D settingsin the left sidebar.
- Click on the
Program Settingstab.
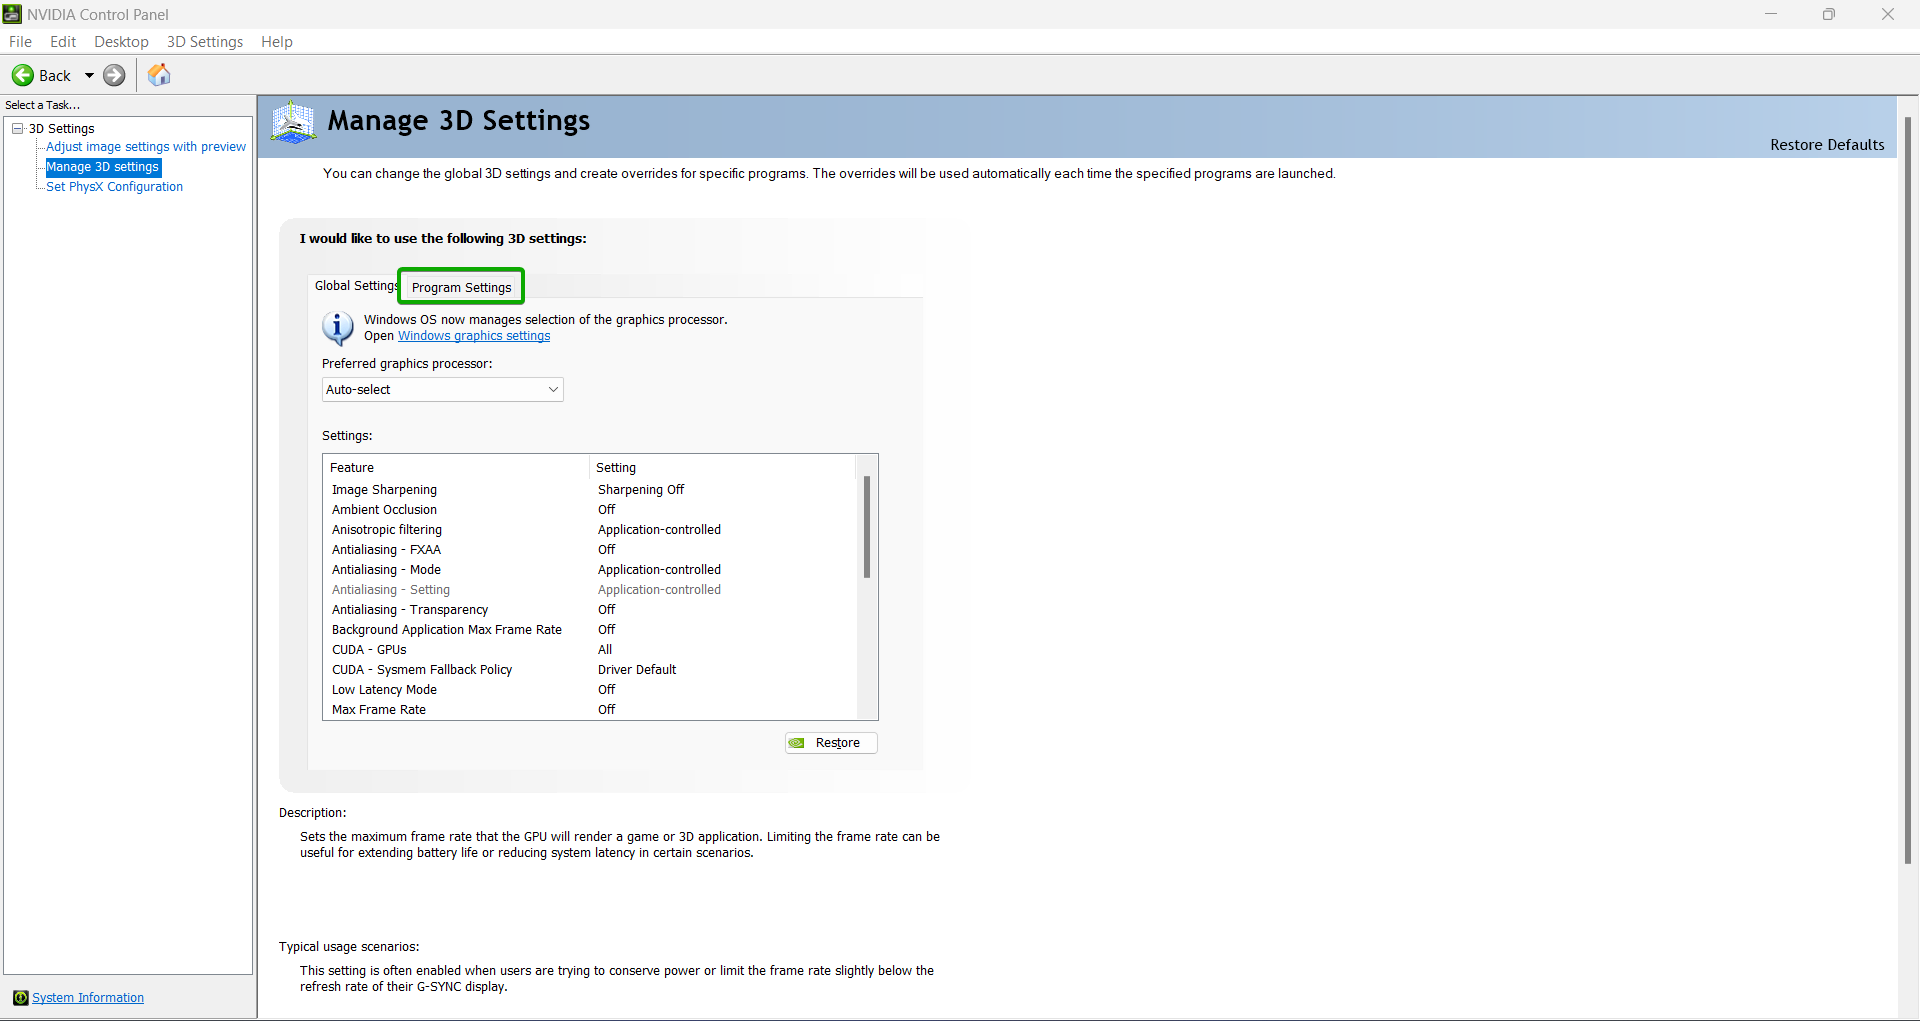
- Click on the
Addbutton
- Click on
OpenJDK Platform Binaryin the list of programs, then click on theAdd Selected Programbutton.- Its possible that multiple
OpenJDK Platform Binaryprograms are listed. In this case you can hover over each one with your mouse to see the full path. You will want to select the one that is located in the.ftbadirectory. If there are multiple, you will want to repeat this step for each one. - You might also see
net.minecraft.client.main.mainin the list of programs. If you do, you will want to repeat this step for that program as well.
- Its possible that multiple
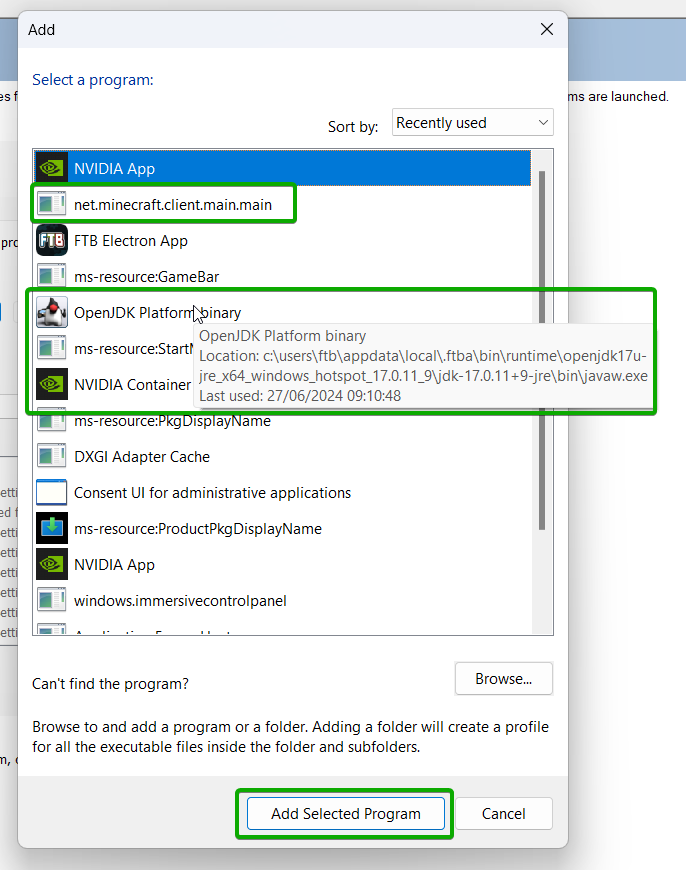
- In the
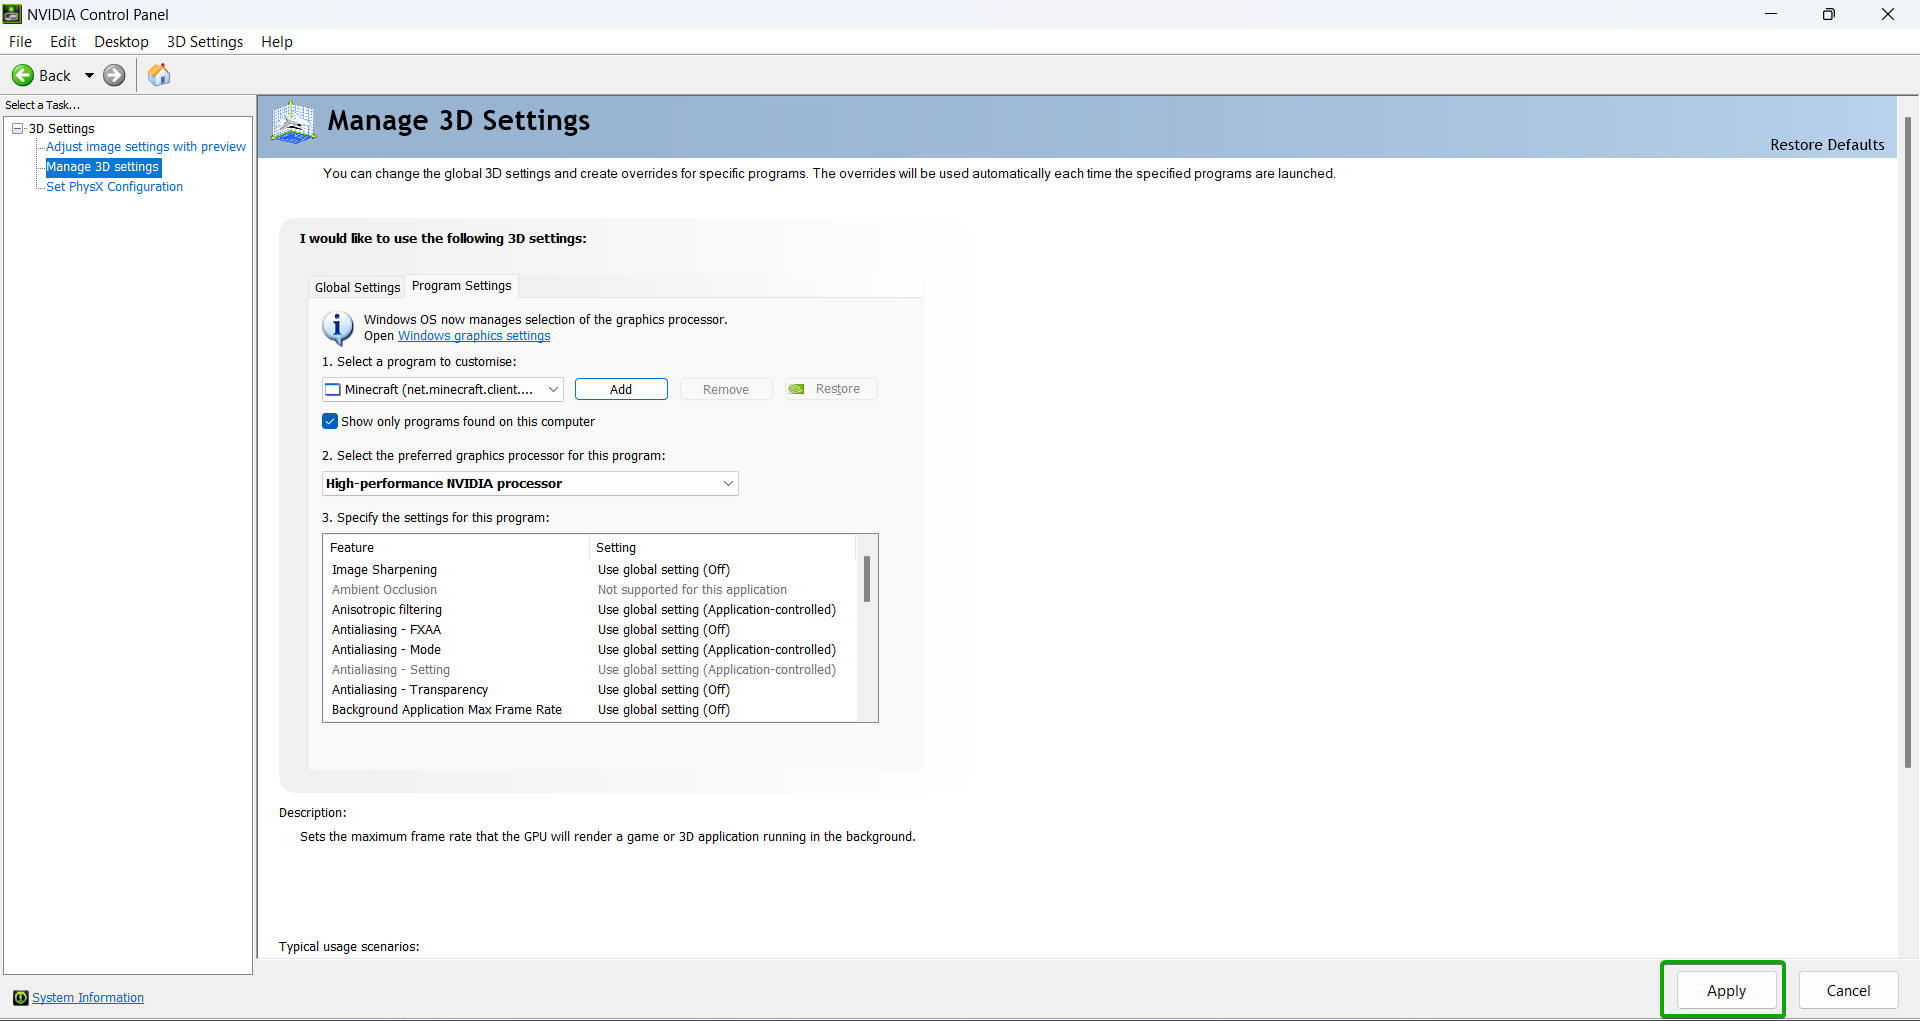
Select the preferred graphics processor for this programdropdown, selectHigh-performance NVIDIA processor.

- Apply the changes by clicking on the
Applybutton in the bottom right corner.
caution
We currently dont have a guide on how to force Minecraft to use the dedicated GPU on AMD.
Please join our Discord and ask in the #help-and-support channel for help.